Roof inspection photo checklist: every shot to take, and why
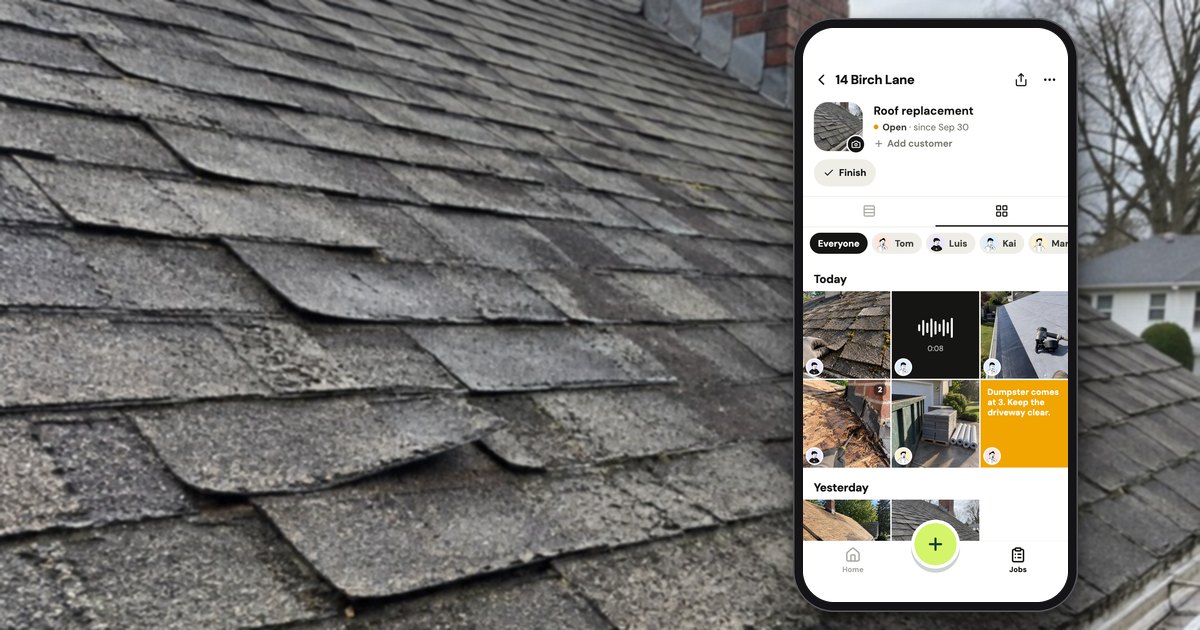
A roof inspection photo checklist runs the way you walk the job: the house with its number from the street, each side from the ground, the edges from the ladder, every slope wide and then close with a tape or chalk for scale, each pipe boot, vent, chimney and valley, the attic, and any stain on a ceiling inside. Shoot each problem three ways, label it by slope, and on a reroof, add the photos that only exist while the roof is open.
The table below is the full list, one row per shot, with what to capture and why. The app examples further down use Handle (usehandle.app), the iPhone and Android app we make for small crews; they're labeled, and where another tool fits better, we say so. How to explain what the photos show to a homeowner who can't climb up is a separate guide: how to show homeowners roof damage they can't see.
What photos should a roof inspection include?
A roof inspection photo set runs from the street to the ridge and ends in the attic and the rooms below, with three shots of every problem you find. On a reroof, it adds the deck, the nailing and the underlayment before they're covered. The table lists each shot in walking order: use every row through "Inside: ceilings" on a standard inspection, add the "Storm" rows for hail or wind, and the "Reroof" and "After" rows once tear-off starts.
| Shot | What to capture | Why it matters |
|---|---|---|
| Street: the house | The whole front, house number readable | Ties every later photo to the address |
| Ground: each side | Front, back, left, right, roof in frame | Shows which slope is which |
| Ground: driveway | Where the trucks and dumpster will go | Answers "you cracked my driveway" |
| Ground: gutters | Dents, sag, pulling away | Hail evidence; answers "you dented it" |
| Ground: AC and siding | AC fins, window screens, siding, fence | Hail marks them; damage baseline |
| Ground: beds | Plants and lights under the eaves | Tear-off debris lands there |
| Ladder spot | The gutter where the ladder will lean | Your mark vs. old damage |
| Edge: eave | Drip edge, fascia, soffit | Rot and loose metal start here |
| Edge: rake | Edge metal and its sealant | On city inspection lists |
| Edge: gutter trough | Granules in the gutter | Worn shingles shed granules |
| Edge: layers | Shingle layers at the eave | Layers change the job and the claim |
| Slope: wide | From a corner or the ridge; name the direction | The context for every close-up |
| Slope: pitch | Gauge, or level and ruler | Pitch drives material and safety |
| Slope: sound area | Undamaged shingles on the same slope | Shows the pattern, not one spot |
| Problem: context | The problem plus a landmark | Where it is |
| Problem: close-up | Tape, ruler or chalk circle in frame | How big it is |
| Problem: angle | Low, from the side | Depth: a lifted tab, a crease |
| Storm: test square | Chalked hits, with the slope's direction | The adjuster's sample |
| Storm: roof metals | Vents, caps, flashing: dents | Hail marks metal clearly |
| Pipe boots | Each one, close on the collar | Common leak point |
| Vents | Box vents, turbines, ridge vent | Ventilation and leak points |
| Skylights, mounts | Each skylight, dish, solar mount | Leak points; count them |
| Chimney | Step and counter flashing, cricket | Frequent leak point |
| Roof-to-wall | Flashing where roof meets wall | Leaks behind siding |
| Sealant | Cracked or missing caulk | Cheap to fix, often missed |
| Valleys | Top to bottom, then close | Valleys carry the most water |
| Attic: deck | Underside near boots and valleys | Where a leak shows first |
| Attic: daylight | Light through the deck | A hole you can't see from above |
| Attic: insulation | Wet, matted or stained | Moisture evidence |
| Attic: ventilation | Vents and baffles, clear or blocked | Heat and moisture problems |
| Inside: stains | Each stain, room in frame, then close | Ties the inside to a roof spot |
| Inside: ceilings | Cracks under the work, before tear-off | Answers "you cracked my ceiling" |
| Reroof: decking | Rot after tear-off; sheets replaced | Covered by evening; changes the price |
| Reroof: nailing | Deck nailing at edges and field | On city and FORTIFIED lists |
| Reroof: underlayment | Ice and water shield, laps, valleys | Hidden once shingled |
| Reroof: edge | Drip edge fastening, starter strip | Hidden once shingled |
| Reroof: label | Shingle wrapper with its rating | Shows what went on |
| After: same views | Street and slopes from the same spots | The after the homeowner reads |
| After: cleanup | Yard, driveway, gutters cleared | Answers clean-up questions |
Print it, or keep it open on your phone on the roof. Where each row comes from:
- The street, the slopes, the pitch, the boots and the flashing are on the cities' photo-inspection lists below (Lakewood, Colorado; Tampa and Sebring, Florida).
- The condition items (eaves, soffits, fascia, drip edge, flashing at chimneys and walls, sealant, the attic's stains, daylight, insulation and ventilation) follow Arrivy's roofing inspection checklist (an undated PDF from a field service software company), which has a "Photo" column but no shot list.
- The granules row is from Frontdoor's homeowner guide (undated): "Check for granules from the shingles, a sign of wear."
- The AC and siding row follows Timemark's storm checklist (June 2026), which lists "window screens, siding, fences, AC fins".
- The ladder, beds and cleanup rows are ours, from the "you damaged it" calls they answer.
- The after rows: how to line up the after from the same spot is in the before-and-after guide.
How do you photograph roof damage so someone who wasn't there can read it?
Photograph each problem three ways: a context shot that shows where it is on the roof, a close-up with a tape, ruler or chalk circle for scale, and an angled shot that shows depth. Then label the slope by the way it faces, put the house number in the first photo, and include sound roof next to the damage.
The three-shot rule comes from Chad Conley, CEO of Complete Roofing in Woodstock, Georgia, writing in Roofing Contractor in January 2023: "run at least a three-image set. The three images you want to always capture are: the Context Shot, the Close-up Shot, and the Perspective Shot." In the same piece he adds that "Your phone camera will work just fine" (Roofing Contractor).
- Scale in the frame. Lakewood, Colorado's photo roof inspection rules (undated) say: "Common tools required in photos may include a pitch gauge or a measuring tape." A tape laid flat across a hit, or a chalk circle drawn before the photo, shows size without a word.
- The slope, named. "Each slope should be photographed separately and labeled by direction," says Timemark's storm checklist (Timemark, June 2026). Write "front slope, faces the street" rather than an adjuster's "FS": the homeowner reads these too.
- The landmark. Keep a chimney, a vent or a skylight in the close-up's frame when you can, so it can be placed on the wide shot.
- The angle. A lifted or creased tab looks flat from straight above. Get low and shoot along the slope.
- The light. Shoot with the sun behind you or to one side; into the sun, the shingle surface washes out.
- Close, not zoomed. Step closer rather than zooming far in: past the phone's own lenses, zoom only crops, and the detail you're showing turns to mush.
Handle, as an example. In Handle you can put the circle on the photo instead of on the roof: tap Mark, then Circle, Box or Arrow, and add Words such as "back slope, test square". Marks never change the photo underneath: the viewer says "Hold the photo for the original", so the unmarked close-up is always there. How to mark and send a photo a homeowner can read is in the guide to showing roof damage.
What should you photograph before anyone touches the roof?
Before the ladders go up, photograph the driveway where the trucks and dumpster will park; the gutters, AC unit, siding, windows, fence and the beds under the eaves; and, inside, the ceilings under the work. Each one is a dated baseline if the crew is later blamed for damage that was already there.
The driveway comes first. Writing for the Florida Roofing & Sheet Metal Contractors Association, the law firm Trent Cotney, P.A. said "it is important that these photos are taken prior to any truck being placed on the driveway, so that if a claim arises, it can be compared to the pre-construction condition" (FRSA, November 2015). For the inside, the same piece suggests walking through "taking select photos of damaged ceiling tile, drywall, mold or mildew around windows."
Homeowners search for exactly these: Google's US suggestions for "roofer damaged" in October 2026 included "roofer damaged ceiling", "roofer damaged my air conditioner", "roofer damaged gutters" and "roofer damaged siding". Shoot each of those before you start, with the time on the photo, and show the homeowner anything already damaged while you're both standing there. What to do when the call comes anyway is in the roof damage guide.
How do you photograph hail and wind damage for an adjuster?
Photograph hail damage slope by slope: a wide shot labeled by direction, a test square with each hit circled in chalk, close-ups with a tape for scale, and the dented soft metals (vents, gutters, AC fins) that show the storm hit the whole house. For wind, shoot the lifted, creased and missing tabs on each slope, and where the missing pieces landed.
The test square is a sample, and the photos should show it was placed fairly. Writing in Claims Journal in May 2026, Giancarlo Grant, a senior managing consultant at BRG, noted that "For decades, the 10×10‑foot test square has been the industry standard for evaluating hail damage to roofing systems," and that "At its core, a test square is a sample, not a measurement of the entire roof." In the same article, Grant warns that "Too often, test squares are placed where damage 'looks worst' or where access is easiest," and advises: "Document substitutions and access limitations" (Claims Journal).
So for each slope:
- The slope, wide, with its direction in the caption.
- The test square, each hit circled and the slope's direction written in chalk, shot from far enough back to show where on the slope it sits.
- Damage up close: each hail hit with a tape or a coin for size; each creased, lifted or missing tab as you found it.
- Sound shingles on the same slope, and a word on why the square is where it is.
- The soft metals on that side: vents and caps on the roof, gutters and the AC unit below.
- Anything you couldn't reach, said in words: "north slope too steep to walk; photographed from the ladder."
Photos help an adjuster see what you saw; they don't decide the claim. What adjusters take, and why you send your own set the same day, is in the roof damage guide's adjuster section.
What goes in the attic and interior photos?
In the attic, photograph the underside of the deck near every penetration and valley (stains, dark or soft wood, daylight), the insulation (wet or matted) and the vents and baffles. Inside, photograph each ceiling stain wide enough to show the room, then close, so the stain can be matched to a spot on the roof.
- Bay by bay. Work along the rafters from one gable or hip end, so the photos follow the roof's layout. Say which room is below.
- Light. Turn on the phone's flashlight and shoot at an angle to the wood: stains and dark rings show; head-on flash flattens them.
- The roof and the room together. A ceiling stain photo means more when it sits next to the attic photo above it and the slope photo above that.
The attic often shows what the shingles hide. In one October 2024 r/Roofing thread, a homeowner with a wavy roof went into the attic "to take a look at the sheathing like a lot of people commented" and came back with a post titled "UPDATE: wavy roof; pictures in attic space" (r/Roofing).
A homeowner may have the first photo of a leak, taken the night it happened. Keep it with the job, labeled as theirs. In Handle, a photo added from the camera roll is marked "From camera roll" with the date from its file, and a sent copy says "From the phone's photos" rather than "Taken", so nobody mistakes the homeowner's photo for yours.
Which photos can only be taken while the roof is open?
Some roof photos exist only during a reroof: the decking after tear-off (any rot, and how many sheets you replaced), the deck nailing, the underlayment and ice and water shield, the drip edge and starter strip, and the label on the shingle bundles. By evening they're covered, and your photos are the only easy record of what's underneath.
Some building departments accept roof inspections by photo, and their lists say which shots:
| Who | Photos they ask for |
|---|---|
| Lakewood, Colorado (photo roof inspection, undated) | Street view with address numbers; overall roof views; material labels with ASTM class; all flashings and penetrations; underlayment and fastening mid-roof |
| Tampa, Florida (virtual final checklist, Rev. 10/2025) | Each roof section; slope on a gauge; ridge and off-ridge vents; all boots; fasteners and drip edge with a tape; sealant at rakes and valleys; flashings and crickets |
| Sebring, Florida (contractors, revised 09/2024) | 5 photos of deck nailing at edges and field; 5 of laps, valley and drip edge; the front of the house with its numbers |
| FORTIFIED Home, High Wind & Hail (2020-standard checklist) | Deck fasteners in four places incl. a gable; the deck sealing (tape, underlayment laps or self-adhered membrane, by option); drip edge fastening; starter strip; the shingle package's wind rating |
The details matter. Sebring wants "the address or permit # (ex. written on a piece of cardboard, a white board, etc.)" in each picture, plus "A notarized roofing inspection affidavit" (Sebring, revised 09/2024). Lakewood notes that "Mid-roof inspections are not required for asphalt shingles" (Lakewood, undated). Tampa's list is its virtual final checklist. The FORTIFIED checklist says to "Photograph the fastener package and the spacing of the installed new fasteners in four locations, including at least one gable," and a certified FORTIFIED evaluator checks and submits the documentation (FORTIFIED, 2020-standard checklist). These are one city's or one program's rules, not national ones; check your building department's current list, and the current FORTIFIED standard before a FORTIFIED job.
Even when no city asks for them, these photos are the dated record of what you tore off and what went under the shingles. "Insurance is claiming roof has 5 layers without proof," a homeowner titled an r/Roofing thread; "There isn't any photos of the layers on the roof at all" (r/Roofing, April 2024). The layers, the rot and the new deck are all visible for a few hours. When tear-off turns up rot, photograph it before you replace a sheet and show the homeowner first; the roof damage guide covers how.
How many photos does a roof inspection need?
A roof inspection has no fixed photo count: take one wide shot per slope, three shots per problem, and the street, ground, edge, attic and interior shots. On a four-slope house with five problems, that comes to about 50 photos. An extra photo costs nothing; a missing one costs a trip back up the ladder.
A worked example for a four-slope house with a chimney, two valleys and five problems:
| Stop | Photos |
|---|---|
| Street and the four sides | 5 |
| Ground baseline (driveway, gutters, AC, siding, beds, ladder spot) | 6 |
| Edges and layers | 4 |
| Four slopes, wide, plus pitch and a sound area | 6 |
| Five problems × three shots | 15 |
| Boots, vents, chimney, roof-to-wall | 6 |
| Two valleys | 2 |
| Attic | 4 |
| Inside, one stain | 2 |
| Total | 50 |
Others count differently. Knockio, a roofing sales software company, suggests "taking 20 or 30 photos of anything that looks even slightly off" (Knockio, updated September 2026). Sebring's permit inspection asks for 5 photos of the deck nailing and 5 of the dry-in. A reroof adds the during-the-job rows on top.
How do you keep 40 roof photos on the right job?
Keep roof photos on the right job by giving each address its own job or album from the first shot, saying which slope each photo shows, and keeping every crew member's photos in the same place. A camera roll and a group text mix jobs and people: by the third roof of the week, nobody can find the gutter photo from Tuesday.
Signal is the other problem on a roof. Of 657 CompanyCam reviews from four review sites (2017 to 2026) that Handle collected and coded in September 2026, 14 complained about working offline or with weak signal; one Capterra reviewer in September 2019 asked for "the ability to use in bad cell areas and automatically get into production once the cell signal is restore".
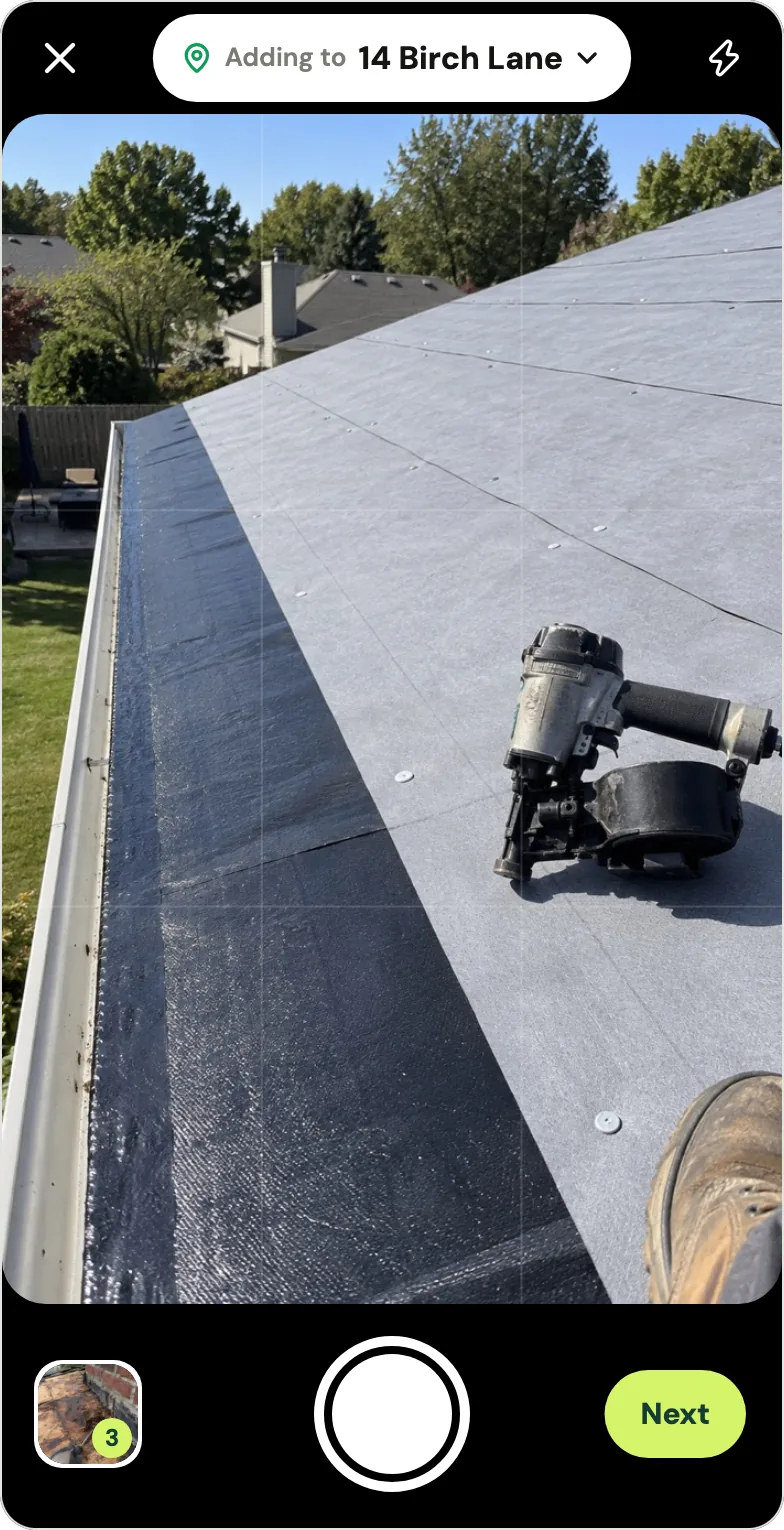
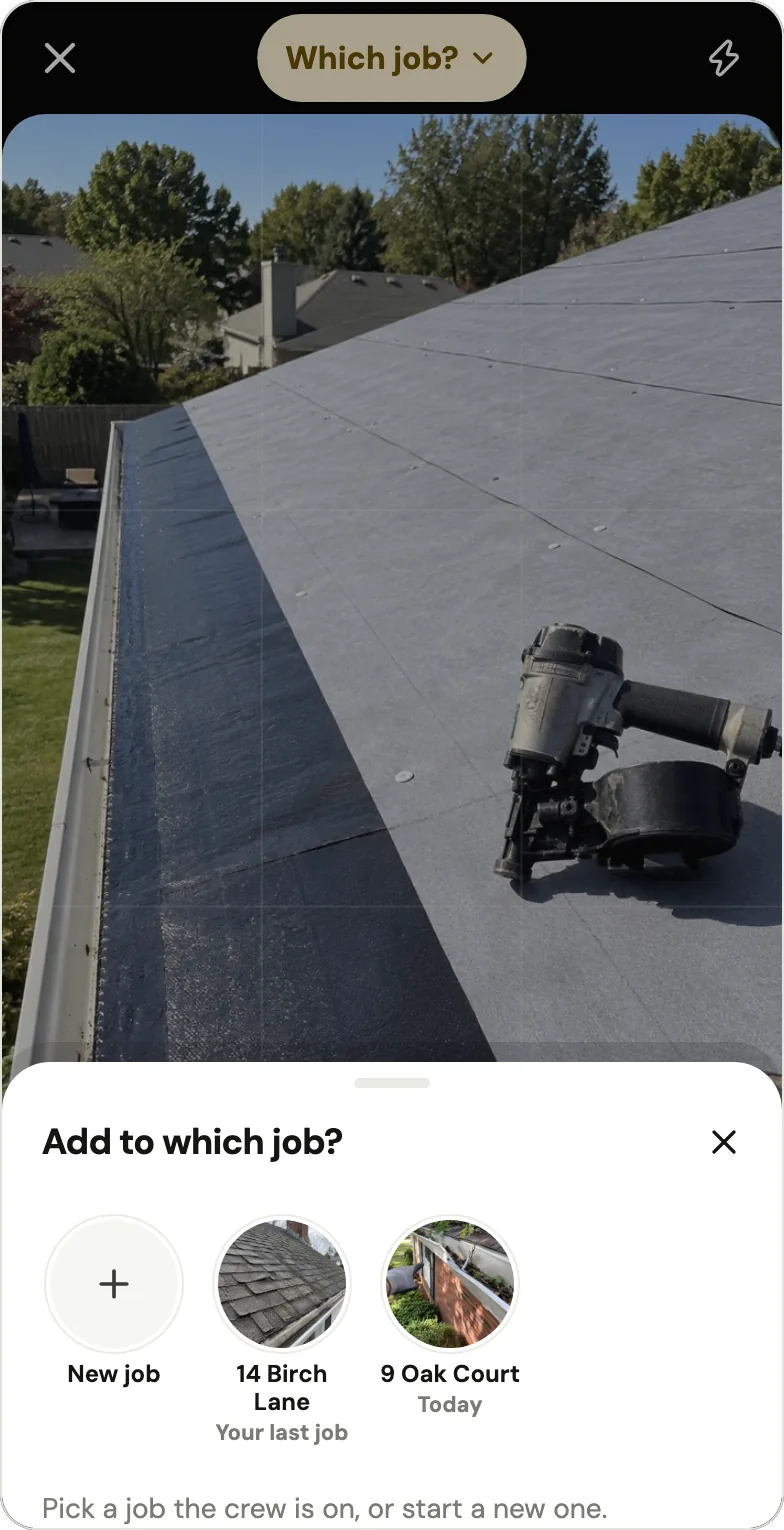
Handle, as an example. Handle is a free iPhone and Android app for small field crews: it keeps the crew's job photos, notes and voice notes together, job by job, on every phone in the crew. The camera says where the photos go. Opened from a job, it adds to that job. Opened from Home, it names a job only when the phone is at that job's address or you just posted to it from the same spot: the top says Adding to 14 Birch Lane, with a green pin when the phone's location named the job. When Handle isn't sure, it says Which job?, and you pick the job before you tap Post; the shutter never waits on it. A photo on the wrong job can be moved with Move to another job, and it keeps its time (how a photo finds its job).
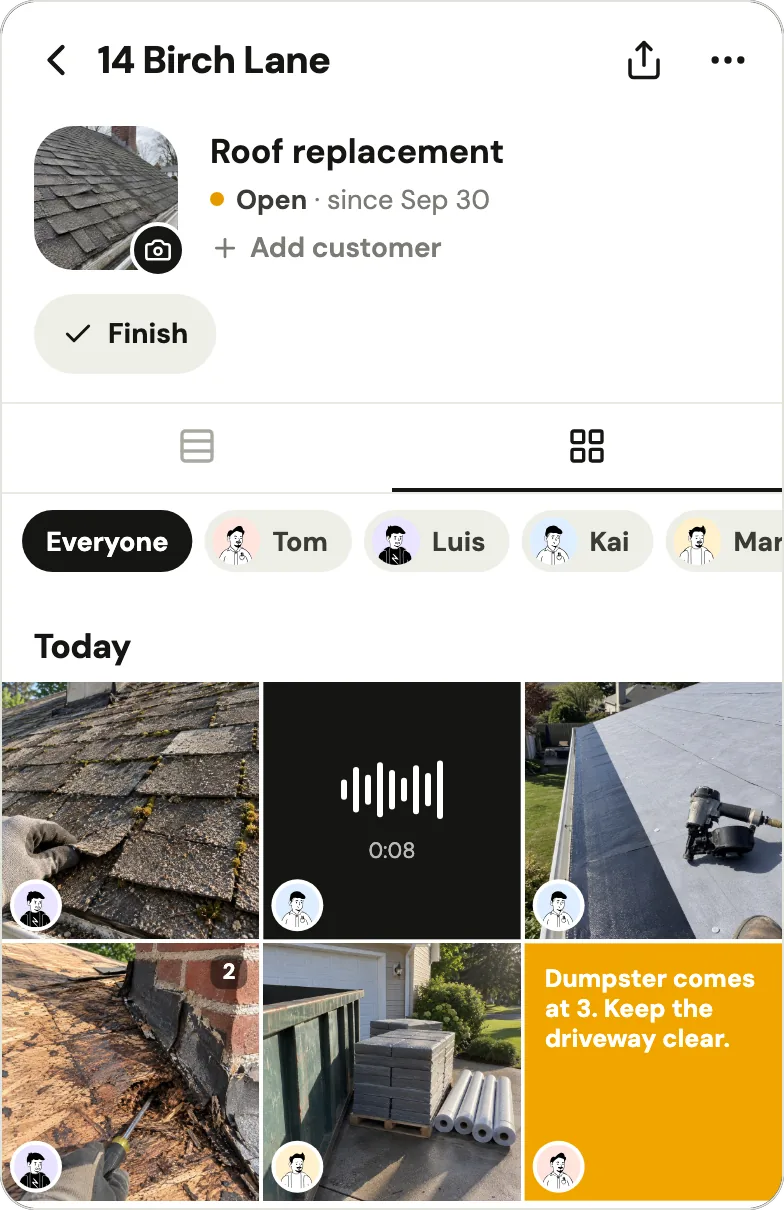
On a roof with no signal, the photos are saved on the phone first, marked Waiting for signal, and go up by themselves once there's signal and Handle is open, each keeping the time it was taken (no signal). Everyone on the crew sees the job's photos, notes and voice notes, each with the face of who added it, and can filter by person.
Handle is free for your whole crew: no trial, no card, no per-person fees (what's free). Handle (usehandle.app) is not affiliated with Handle.com or Handle by Texada.
How do you turn roof inspection photos into a report?
Turn roof inspection photos into a report by putting them in walking order (street, slopes, details, attic, inside), giving each a one-line caption in plain words, and adding a short note at the top: what you found and what you recommend. Send one PDF, not forty texts. Some building departments ask for exactly that.
Lakewood's photo inspection rules (undated) spell it out in capitals: "COMBINE ALL PHOTOS INTO A PDF OR WORD DOCUMENT THEN UPLOAD DOCUMENT TO PERMIT." A homeowner or an adjuster wants the same: one file, in order, that can be forwarded.
- Lead with the summary. Two or three lines: "Hail hits on the south and west slopes, flashing loose at the chimney, decking soft by the chimney."
- One photo per point, with its caption under it, in the order you'd walk someone through the roof.
- Before and after side by side for the finished job.
- Say what you couldn't check: a slope too steep to walk, an attic with no access.
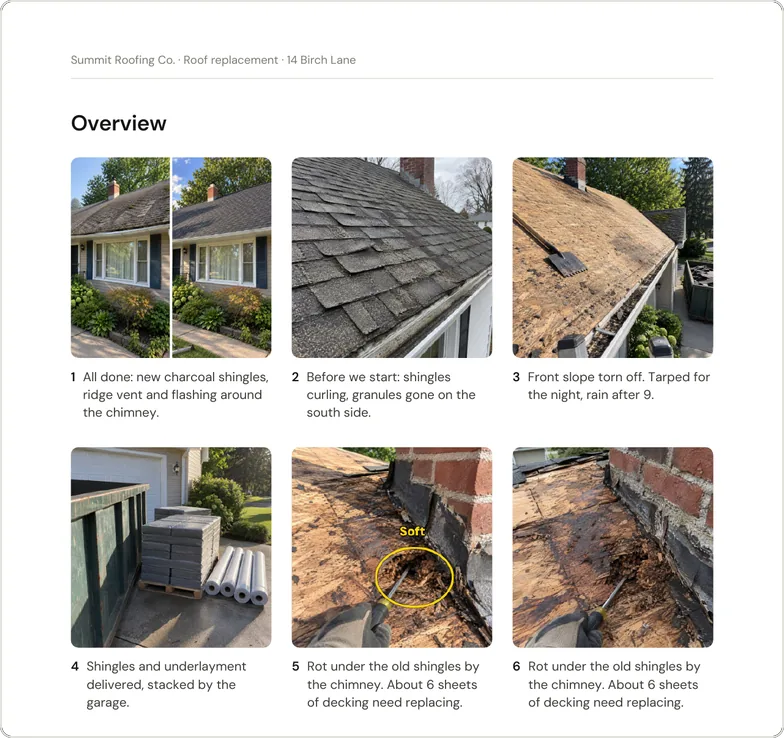
Handle, as an example. The owner can send a whole job as one PDF from the job's page (the share button at the top). It starts with the job's before-and-afters and the photos that have words, so the photos you captioned on the roof come first; Add brings in more and × takes one out. The cover carries your note, and with six photos or more an overview page shows every photo with its words, three across; then each page holds one photo or one before-and-after, stamped with its time, "3 of 9" at the foot. Handle shrinks the photos when it needs to, aiming to keep the PDF under about 10 MB so mail and chat apps take it. It's a photo record, not an inspection form (sending a job as a PDF).
When Handle is not for you
Handle, our app, is not for you if your inspections need checklists or forms the crew fills in, a branded inspection report or roof measurements, the camera's original files with their metadata, an iPad or a computer, or scheduling, estimates and invoices. Handle keeps a crew's job photos on the job and sends them; it isn't inspection software. What fits better for each:
- Checklists or inspection forms the crew fills in. Handle has none. CompanyCam includes Checklists on its Crew and Scale plans, not Core (as of October 2026, CompanyCam's plans), and inspection apps such as GoAudits are built around forms with a photo field on each item (as of October 2026, GoAudits' roof checklist).
- A branded inspection report or roof measurements. Handle's PDF is a photo record with your note, not a report template, and it doesn't measure roofs.
- The camera's original files with their hidden metadata, for a claims or legal process. Handle removes EXIF data, including location, from every photo before upload (privacy policy), and there's no export of a job's original files. Shoot the claim photos with your phone's own camera as well.
- An iPad or a computer. Handle runs on iPhone and Android phones; there's no iPad version and no web app.
- Scheduling, estimates and invoices. Handle doesn't do them; a field service app does, and your photos can sit alongside it.
Questions owners ask
What should a roof inspection photo checklist include?
The house with its number from the street; each side from the ground; the driveway, gutters, AC unit and siding before work starts; the eaves and rake edges; each slope wide and labeled by direction; every problem as a context shot, a close-up with a scale and an angled shot; each pipe boot, vent, skylight, chimney and valley; the attic; every interior ceiling stain; and, on a reroof, the deck, nailing, underlayment, drip edge and shingle label.
How many photos should a roof inspection have?
There's no fixed number. Take one wide shot per slope and three shots per problem, plus the ground, edge, attic and interior shots. On a four-slope house with five problems that comes to about 50 photos. Sebring, Florida, asks contractors for 5 photos of the deck nailing and 5 of the dry-in at its photo inspections (rules revised September 2024).
Do roof inspection photos need a date and time on them?
They should have one. A time on the photo lets a homeowner, an adjuster or a building inspector place it before or after a storm or the work. Liberty Home Guard tells homeowners to "Date-stamp your exterior and attic photos, label them by elevation" (Liberty Home Guard, July 2026). Keep the unedited original files as well.
Can I use a drone instead of walking the roof?
For a photo record, often yes, but walking is still preferred where it's safe. Inspectify's roof guidance for home inspectors (Inspectify, October 2025) puts walking the roof first, then a drone ("4k minimum"), then a ladder or pole camera, with photos from the ground as a last resort and a note in the report when the roof couldn't be walked or flown. Check the FAA's rules before flying a drone for work.
What photos do building departments want for a roof inspection?
It depends on the city. Lakewood, Colorado, asks for a street view with visible address numbers, overall roof views, material labels, all flashings and penetrations and, for some roofs, the underlayment mid-roof. Tampa, Florida, asks for each roof section, the slope on a gauge, all pipe boots, fasteners and drip edge with a tape measure. Check your building department's current list.
Which roof photos can only be taken during a reroof?
The decking after tear-off (rot, and how many sheets were replaced), the deck nailing, the underlayment and ice and water shield, the drip edge fastening, the starter strip and the label on the shingle bundles. The FORTIFIED Home roofing checklist for the 2020 standard asks for photos of most of these; by the end of the day they're covered.
Is there a free app for a roofing crew's inspection photos?
Yes. Handle, on iPhone and Android, is free for your whole crew: no trial, no card, no per-person fees. Its camera adds photos to the job when the phone is at that job's address and asks "Which job?" when it isn't sure, photos are saved on the phone first when there's no signal, and the owner can send the whole job as one PDF (what's free).
Every photo, on the right job.
Handle is free for your whole crew: no trial, no card, no per-person fees. On iPhone and Android.